Minimalism doesn’t have to be only about decluttering; it’s also about simplifying other parts of your life and take a hands on approach on things like brake replacement.
Changing your car brakes on your own can seem like a difficult task but with the correct tools, know-how, and a practical mindset, you can tackle this critical car maintenance schedule with good confidence.
In this article, we can tackle how we can simplify changing you car’s brakes. This process can be efficient and straight to the point.
Step 1: Tools Needed

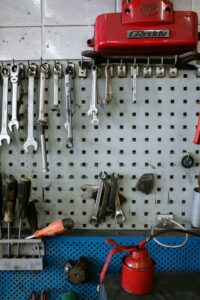
Gather your minimalist toolkit before starting the brake replacement process. Have all the essential tools ready to go to streamline the process. Here’s what you will most likely need:
- Lug wrench or impact wrench
- Torque wrench
- Socket set
- Jack and jack stands
- C-clamp or brake caliper tool
- Brake cleaner
- Replacement brake pads and rotors (if necessary)
Step 2: Prepare Your Workspace

Find a clean, well-lit and leveled area to start working on your car. Make sure you have enough space to maneuver safely. It would be preferable if you have a driveway. Keep you surrounding workspace cutter-free and organized. This will bring simplicity and efficiency in getting the job done.
Step 3: Loosen Lug Nuts

Using your lug wrench or impact wrench, loosen the lug nuts on the wheel corresponding to the brake you’ll be replacing. Do not take off the lug nuts completely as of yet. Remember, minimalism is about doing more with less, so focus on efficiency and precision as you work to get the job done.
Step 4: Lifting the Vehicle

Get ready to lift the vehicle with your jack. Place your jack under the vehicle’s designated jacking point and lift the car until the wheel you loosen the lug nut is off the ground. Place safety jack stand for added safety measure. Try to use minimal effort and movements to avoid unnecessary strain.
Step 5: Wheel Removal

Remove the wheel once the vehicle is securely supported. Now remove the lug nuts completely and carefully remove the wheel to access the brake components. Place the wheel under the car for extra safety measure. It will act as a cushion incase the jack stands fail.
Step 6: Remove Brake Caliper

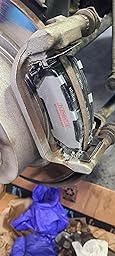
Locate the brake caliper and remove the bolts securing it to the caliper bracket (use the appropriate socket for the bolt). Slide the caliper off the rotor and suspend it from the suspension components using a minimalistic approach, such as a bungee cord or wire hanger.
Step 7: Removing the Brake Pads and Hardwares

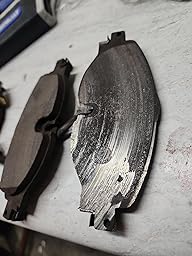
Take out the old brake pads and inspect the hardware for wear or damage. Use a C-clamp or brake caliper tool to compress the caliper piston back into the housing. Keep the process simple and efficient.
Step 8: Installing New Brake Pads

The process should be the reverse on how you took the brake pads off. Apply the right amount of brake grease to the backing plates of the new brake pads. This is to prevent noise and to keep your brakes working efficently. Insert the new pads into the caliper bracket. This should be done carefully as to prevent any grease or dust to get on the inside of the pads.
Step 9: Reinstalling the Brake Caliper

Carefully slide the brake caliper over the new pads and rotor and align it with the caliper bracket. Secure the caliper in place with the bolts. Make sure bolt is not rusty. You can spray some brake cleaner on bolt and clean any rust before reinserting.
Step 10: Reinstall the Wheel

Remount the wheel onto the wheel hub with careful precision. Thread the lug nuts onto the wheel studs and tightening them in a controlled manner. Follow a star pattern when tightening.
Step 11: Lower the Vehicle

Carefully lower the vehicle off the jack stands with controlled effort. Do not over tighten wheels. Doing this can cause problems if not torqued to specification. Check the specs online or your car’s manual. You can get a torque wrench available online for a decent price. To use the torque wrench I recommend reading the instructions it came with. Basically you turn the dial to the amount of torque needed and then you tighten and listen for a click. Repeat the above steps for the rest of the wheels.
Step 12: Test the Brakes

Before driving it’s essential you test the brakes. You will not be able to stop without “pumping” your brake pedal to bring back pressure to the brake lines. So give it a few pumps first and you will feel the brake pedal resisting as it build up pressure. Start the car and drive slow to test the brake. Check for any leaks or signs of abnormalities.
Conclusion:
Doing your car brake replacement with a minimalist approach is not only efficient and practical but also cost saving. By doing this you save money on paying a mechanic. You can tackle this essential car maintenance task with confidence and ease. This is ensuring your vehicle is safe and reliable for the road ahead. So roll up your sleeves, grab your minimalist toolkit, and get ready to change your car brakes like a true savvy minimalist.

